
I always thought those big single cylinder engines used to power anything from wood/machine shops to all kinds of farm equipment were pretty cool.
They are often reffered to as hit and miss engines do to the fact that some designs cut out the ignition to control speed. This type of engine would fire (hit) until desired RPM was reached and then miss until the the speed governing device called for power again. Normally the exhaust valve is also held open during the miss cycles as to not wast fuel and power on compressing a mixture that would not be fired.
Some of these engines were throttle controlled they fired on every power stroke and speed was controlled by a throttling valve in the mixer this type of speed control was desireable if the engine was to be used to power a dynamo as the speed is more constant.
Note: click on any pictures to view in full size.
On to the fun part Jan of 2010 I'm at a local guys place dropping off a scrap engine to be recycled and shooting the breeze. When I notice a couple big flywheels among all sorts of other cool old stuff, I immediately wonder over to knowing it must be a old engine.
Sure enough its most of a hit and miss unknown brand at this time, the crankshaft, flywheels, water hopper, mixer, base, piston and rod less cap are all there. I don't see a cam the push rod is rusted in half twice!
But none the less all the big parts are there and restorable.
So I'm not sure how the bs'ing went from there but he ends up telling me if I think I want to restore it I can have it I think OK cool and leave for the day without taking the engine or talking much more about it.
A couple months go by and I stop in to bs and he ask if I still want the thing Hell yes I say so he fires up a tractor and we load it in the truck along with any parts I can find laying there in the dirt.
Great! Now I have another project just what I need, but hey who could pass up a free engine...Right?
I get the thing home unload it with a engine hoist set it in the dirt along side the shop and forget about it for a while thinking I'll finish my other car restoration first, be for getting into this but start thinking its just a old engine don't take up much space, how hard can it be? I can work on it and the car at the same time.
So... Out comes the engine hoist and the crankshaft with flywheels is removed from the base and rolled in.
Next three nights are spent carefully removing the flywheels, someone in the past had beat on one end of the crankshaft mushrooming it so I had to file for hours to get the flywheel off that side.
Lots of heat, oil, special purpose built puller, and a few choice words later the flywheels are off.
The crankshaft main journals look nice but the rod journal is shot.
So I think no problem I'll cut it under size in my lathe and weld it up and cut it back to size, I find later that I just can't swing it in my 12x36 lathe.
I decide can't do everything myself and send it off on a no hurry basis to my automotive machine shop to be repaired, more on this later.
I know what you are thinking come on pictures already, OK I will add some above when I find them but for now I will work with what I have on this computer, to many cameras and computers.
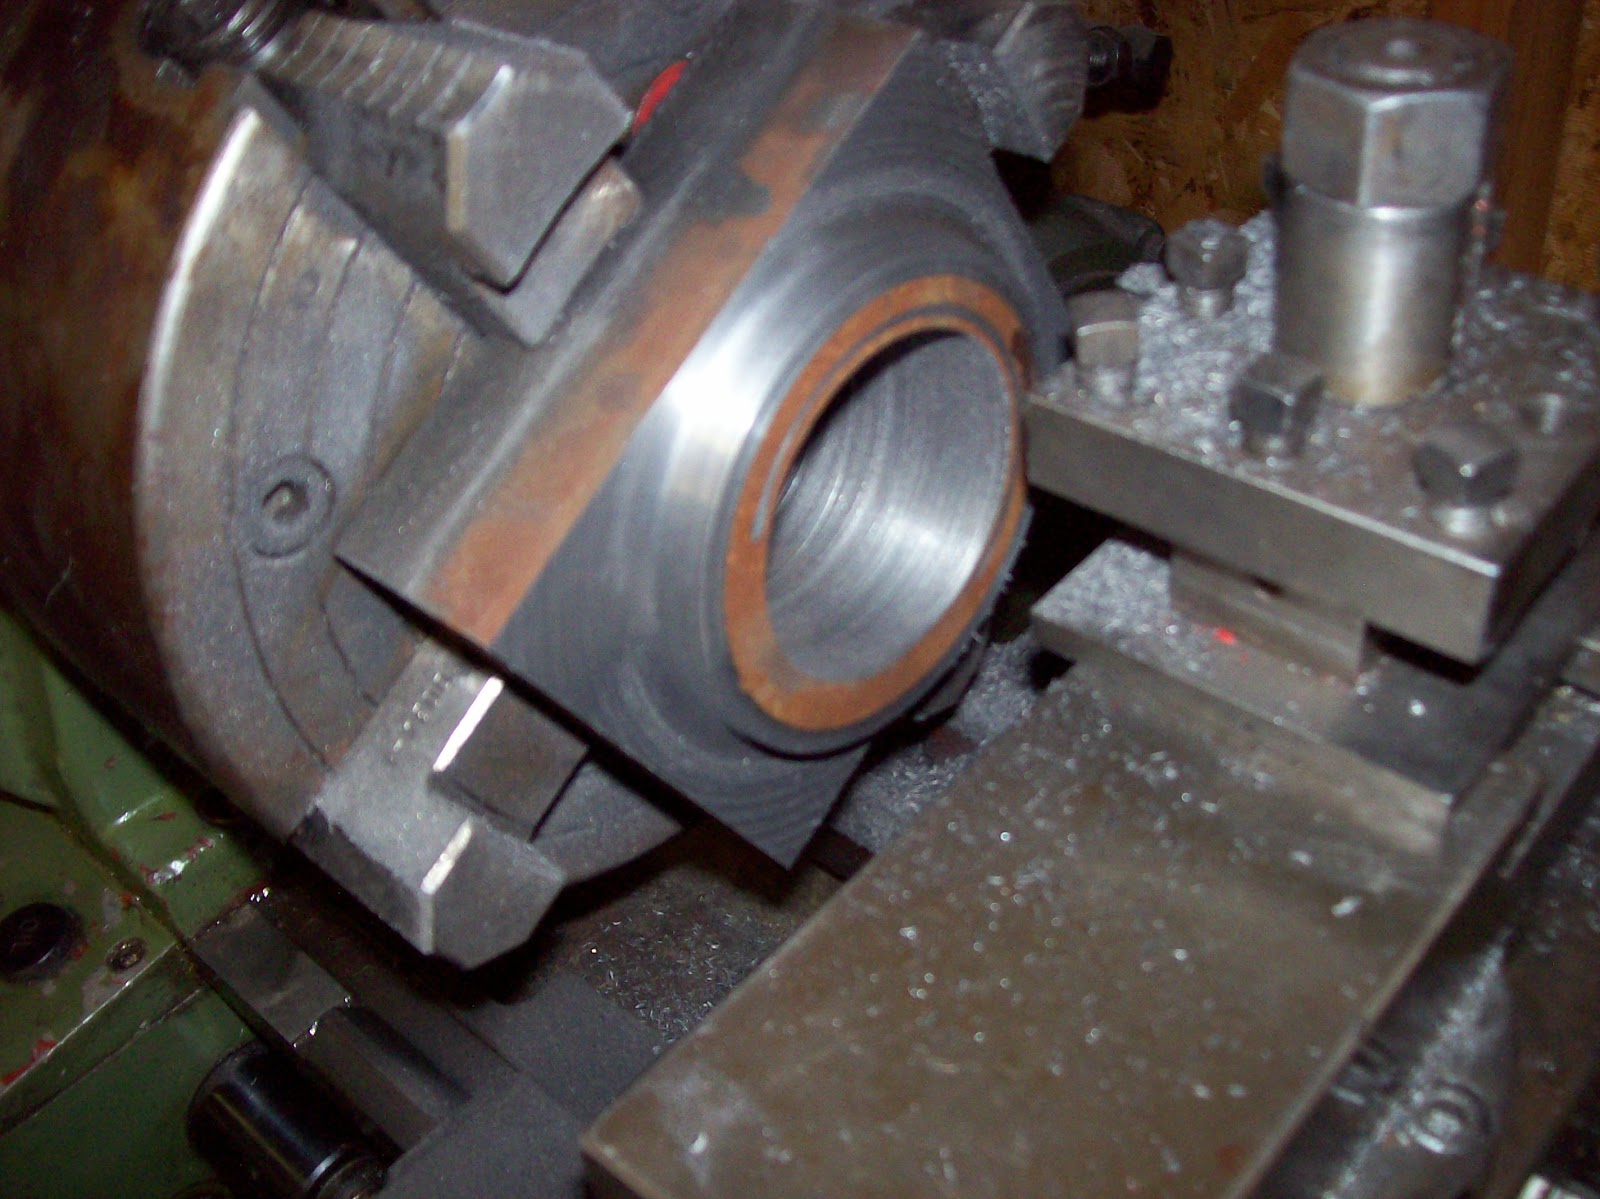
Next was the piston and cylinder piston was stuck really stuck. I started the way every one does soaking various formulas of rust eating juice, from diesel fuel and trasmission fluid, to coca cola, heat and pressure all to no avail.
Time to get serious off to look for that bottle of hydrochloic acid, found the acid and filled up the cylinder from the back it began bubbling and smoking like a witches brew, now were getting somewhere.
let it boil for a half hour and dumped it out rinsed well and oiled the rod was now moving free and the rust was gone.
Flipped the cylinder over and filled the head side after a few minutes acid started leaking past the piston I knew I was going to get it out.
Dumped the acid, rinsed and oiled then straight to the press (again). I had turned up a 2" think 5" disk of steel to press on the piston with so I would not break the piston slide the disk in and started pressing getting close to 20,000 psi it finally moved with a bang and then stuck again. The piston proceeded to come out in a series of events like this all the way to the last inch.
With the piston out I could tell the the bore was shot, The piston however looked perfect with the rust cleaned off , I had to cut and pry the rings off.
I called around and found that melling automotive could supply a 5" sleeve 13" long in wall thickness up to 5/32" so I ordered the thickest wall sleeve knowing I needed to remove at least 1/8" to get the bore cleaned up enough to take a sleeve.
I set up the cylinder in the mill and made a boring bar for the job.

After a few passes and careful measurement it was ready for the sleeve.


Ok here we go the cylinder was warmed up a little loctite was applied to the sleeve press was ready, the sleeve and cylinder were machined for a .005 press fit.

Sucsess!
The sleeve comes under size so the cylinder was set up in the mill again and the sleeve bored and honed to size.

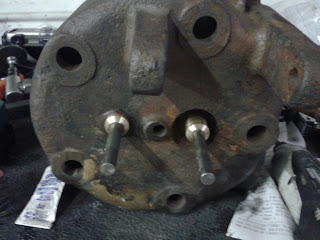
That's one big part of the project done. Now about that missing rod cap.
Next up making a connecting rod cap.
This was started with a square block of cast iron milled to rough size.
This was started with a square block of cast iron milled to rough size.
Then chucked up in the four jaw on the lathe and a step cut and bored to just under finished size.
It will be cut in half and bolted to the rod for finish boring.


After cutting in half the bolt holes are drilled and the cap mating surface is ground flat.
The cap is the bolted to the rod for final boring and finishing.


The square corners will be rounded off to match the rod by hand.
What about that crankshaft?
Turns out they couldn't turn anything there crank grinder can only go to 7" stroke.
They can send it out but the price is just too much, so back to doing it myself .
The guy I got the engine from just happens to have a 16" monarch lathe so I asked if I could use it he said yes,so a fixture was made to hold the crank with the rod journal on center and it was undercut welded and cut back to size 2"
Undercutting


After machining weld
Another big step.
During all this time I had searched ebay for missing parts and slowly parts came up.
First a governer for a 3 horse power mine is a 5 horse but the only differance is the push rod length so I bid and got the governer.
Next I started watching for a wico magneto after a year one came up in silverton OR.
I bought it and it was repairable, The wico magneto's are simple devices but require some pretty tight tolerances to produce a good spark.
The armature bushing was wore out in the mag I bought, Dave a friend of mine made up a new bushing for it while I worked the other parts.
Once the magneto was cleaned up a few connections repaired and the new bushing installed we had spark!


Another piece of the puzzle complete, just need to straighten and paint the covers.
Next up was the head.
I was dreading this the valve stems were rusted off flush with the head, the mixer and exhaust elbow were stuck.
There was a crack from freezing, to go along with all this the gasket surface was pitted too badly to use.
I Started with a oxy fuel torch, oil, and a big hammer.
This was getting nowhere fast, nothing was breaking loose or showing any signs of moving, to many years of rust.
I ended up cutting off the exhaust elbow and collapsing the pipe in the head to get it out same with the mixer.
I then found that the mixer end of the pipe seemed to have the mixer cast around it had Dave bore out the remaining pipe and I brazed a new pipe into the mixer.
Out came the drill motor and bits started by drilling the exhaust rocker pin from each end enough to remove the rocker.
The rest of the pin was still stuck in the rocker arm tried heat, oil, the press, then gave up deciding it would have to be drilled out and set it aside.
Next the head was set up in the mill to try and drill out the valve stems.
No matter what tooling I used it wanted to wander off into the soft cast, finally I just drilled it through and was able to drive out the remaining pieces of valve stem.
The valve guide was now badly out of round from the end mill wandering, with the harder stem material out of the way a 5/8" end mill was used to open up the guides back to round and square.
New bronze guides were made on the lathe and pressed into the head and reamed back to the standard 3/8" size.
New valves were made on the lathe they are a two piece valve A2 drill rod for the stems and druabar for the head.
 valve
valve
 Guide
Guide
 Guide
Guide
After getting the head stripped and cleaned it was time to resurface. The head is a stepped design so can't just be surfaced across the entire area.
Only the outer rim where the gasket sits gets resurfaced, I could not come up with a convenient way of holding it in the lathe.
I don't have a rotary table for my mill but Dave has one, rather than pack Dave's table over to my place I took the head over and used Dave's mill.
We mounted the vice to the rotary table, then centered up the head were able to resurface it.
After getting a good gasket surface the head was cleaned one more time and the guides installed, seats re cut, and new vales lapped in.


Now it was time to start getting the base, flywheels and other castings ready for assembly.
I thought about trying to clean up the castings myself, then called the local powder coat shop to see what they would charge to sand blast the base and flywheels $25.00 was the price I took them right over.
The parts came back spotless.
The clean parts were filled with bondo where the rust pitting was bad, I don't like a engine to look like a show car so the filler was only used in a few spots where the rust had badly pitted the castings.
The water hopper was filled and sanded smooth the factory did the same, the parts were then primed.
The base, cylinder, head, and water hopper were bolted together and painted.
The color is international harvester red it is supposed to be close to orignal.
Paint brand is nasson acrylic enamel in there equipment line a hardener was used to make the finish more durable and resistant to gas and oil.
Safety note: Any catalized paint or primer contains isocyanates use proper protection.


The armature bushing was wore out in the mag I bought, Dave a friend of mine made up a new bushing for it while I worked the other parts.
Once the magneto was cleaned up a few connections repaired and the new bushing installed we had spark!

The Mag as I got it.

The Mag with covers removed

New armature bushing
Another piece of the puzzle complete, just need to straighten and paint the covers.
Next up was the head.
I was dreading this the valve stems were rusted off flush with the head, the mixer and exhaust elbow were stuck.
There was a crack from freezing, to go along with all this the gasket surface was pitted too badly to use.
I Started with a oxy fuel torch, oil, and a big hammer.
This was getting nowhere fast, nothing was breaking loose or showing any signs of moving, to many years of rust.
I ended up cutting off the exhaust elbow and collapsing the pipe in the head to get it out same with the mixer.
I then found that the mixer end of the pipe seemed to have the mixer cast around it had Dave bore out the remaining pipe and I brazed a new pipe into the mixer.
Out came the drill motor and bits started by drilling the exhaust rocker pin from each end enough to remove the rocker.
The rest of the pin was still stuck in the rocker arm tried heat, oil, the press, then gave up deciding it would have to be drilled out and set it aside.
Next the head was set up in the mill to try and drill out the valve stems.
No matter what tooling I used it wanted to wander off into the soft cast, finally I just drilled it through and was able to drive out the remaining pieces of valve stem.
The valve guide was now badly out of round from the end mill wandering, with the harder stem material out of the way a 5/8" end mill was used to open up the guides back to round and square.
New bronze guides were made on the lathe and pressed into the head and reamed back to the standard 3/8" size.
New valves were made on the lathe they are a two piece valve A2 drill rod for the stems and druabar for the head.


After getting the head stripped and cleaned it was time to resurface. The head is a stepped design so can't just be surfaced across the entire area.
Only the outer rim where the gasket sits gets resurfaced, I could not come up with a convenient way of holding it in the lathe.
I don't have a rotary table for my mill but Dave has one, rather than pack Dave's table over to my place I took the head over and used Dave's mill.
We mounted the vice to the rotary table, then centered up the head were able to resurface it.
After getting a good gasket surface the head was cleaned one more time and the guides installed, seats re cut, and new vales lapped in.


Now it was time to start getting the base, flywheels and other castings ready for assembly.
I thought about trying to clean up the castings myself, then called the local powder coat shop to see what they would charge to sand blast the base and flywheels $25.00 was the price I took them right over.
The parts came back spotless.
The clean parts were filled with bondo where the rust pitting was bad, I don't like a engine to look like a show car so the filler was only used in a few spots where the rust had badly pitted the castings.
The water hopper was filled and sanded smooth the factory did the same, the parts were then primed.
The base, cylinder, head, and water hopper were bolted together and painted.
The color is international harvester red it is supposed to be close to orignal.
Paint brand is nasson acrylic enamel in there equipment line a hardener was used to make the finish more durable and resistant to gas and oil.
Safety note: Any catalized paint or primer contains isocyanates use proper protection.


The next few weeks a hour or so each day after work was spent putting it all together.
The 3 horse push rod was lengthened to work on my 5 horse.

The rod was cut and beveled, and a piece of square stock mig welded in and ground smooth.

look at that rust on the old one!


A new fuel tank was welded up out of 16ga. steel
Not much left of the old one just enough to get a size.
Some new parts arrived from hit and miss enterprises in Ohio.
I ordered new piston rings is has three rings each 3/8" wide!
Also ordered new decals for the water hopper, all the springs for the engine, and some mag trip parts the go on the push rod to trip the mag.
I will post some better pictures later a few little things left to do but it runs.

Video of run
No comments:
Post a Comment